
Our Process: 5 Layers of Professional Protection
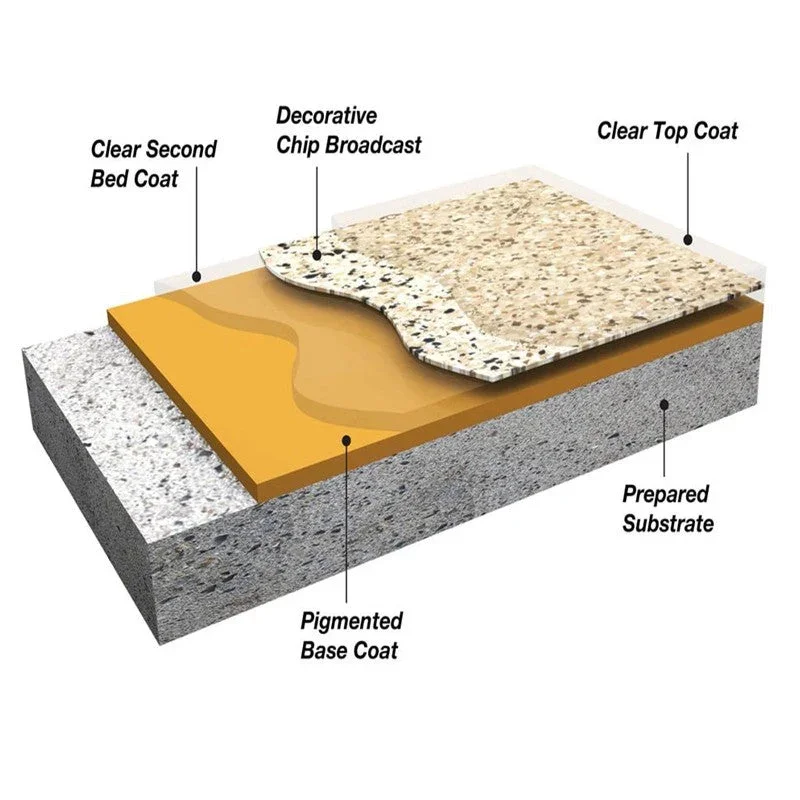
At Berry Brothers Epoxy, we don’t just paint your floor—we engineer a multi-layered chemical armor system designed to look flawless and last a lifetime. A premium epoxy or polyaspartic floor requires a seamless combination of mechanical preparation and industrial-grade chemistry.
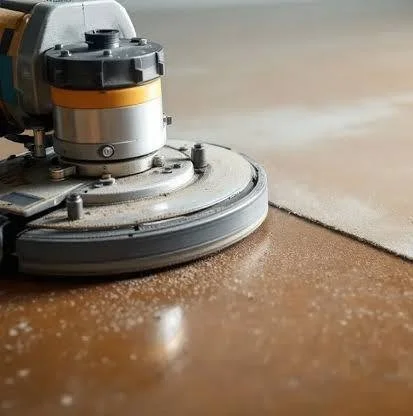
⚙️ Step 1: Diamond-Grind Concrete Preparation
A premium floor is only as good as the preparation beneath it. Contractors discard simple acid washes in favor of heavy-duty walk-behind diamond grinding machinery. This mechanical process grinds away old paint, oil stains, and impurities, opening up the concrete pores to create an optimal surface profile for maximum chemical adhesion.
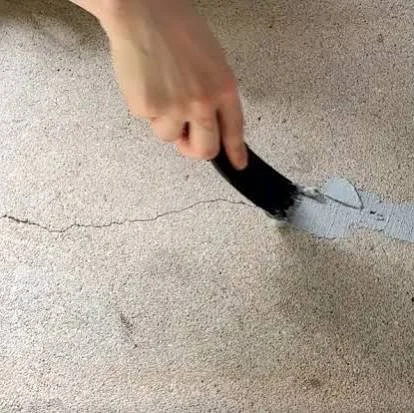
🩺 Step 2: Crack Patching & Moisture Remediation
Once the raw concrete slab is opened, any spiderweb cracks, pitting, or expansion joints are thoroughly cleaned out and filled using an industrial floor-patch epoxy gel. Once cured, these patches are ground perfectly flush with the slab to create a seamless canvas. If moisture levels in the slab are elevated, a specialized moisture vapor barrier primer is rolled across the floor to prevent future blistering.
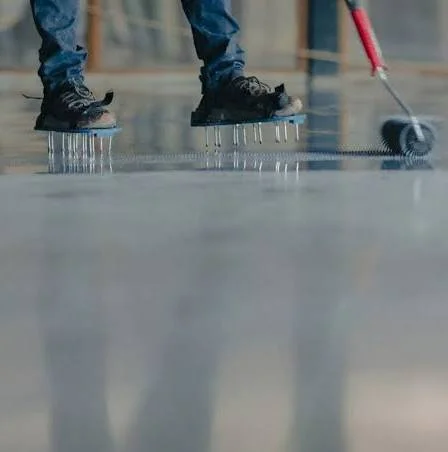
🧪 Step 3: Base Coat Application (Squeegee & Back-Roll)
The 100% solids epoxy base coat is mixed precisely and poured directly onto the floor in ribbons. Installers use a notched squeegee at a low angle to spread the resin across the floor to a uniform thickness, then immediately follow up by cross-rolling with an 18-inch paint roller to completely level the material and eliminate any application lines.
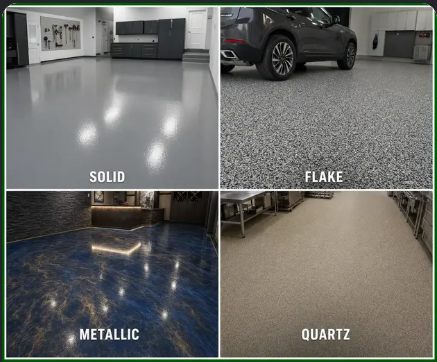
🎨 Step 4: Decorative Broadcast or Architectural Effects
Depending on the client's chosen style, this is where the floor transforms:
Flake Systems: Colored vinyl flakes are thrown high into the air, allowing them to rain down evenly onto the wet base coat until the floor is completely blind-saturated.
Metallic Systems: Dynamic metallic powders suspended in clear resin are poured onto the floor and blended with a flat squeegee to create a marble-like architectural look.
🛡️ Step 5: High-Performance Protective Topcoat
After the body coats have thoroughly cured, the floor is scraped or lightly sanded to remove high spots or loose flake remnants. The final layer—typically a high-wear polyaspartic or polyurethane topcoat—is squeegeed and back-rolled over the surface. This protective armor provides UV resistance, prevents yellowing, and guards against hot-tire pickup and chemical stains
Request a Technical Consultation
Submit the inquiry form to discuss specific project parameters, receive a comprehensive proposal, and begin implementing precise coating or adhesive solutions.